使用 Docker 部署 PeerTube
Skyone
科技爱好者
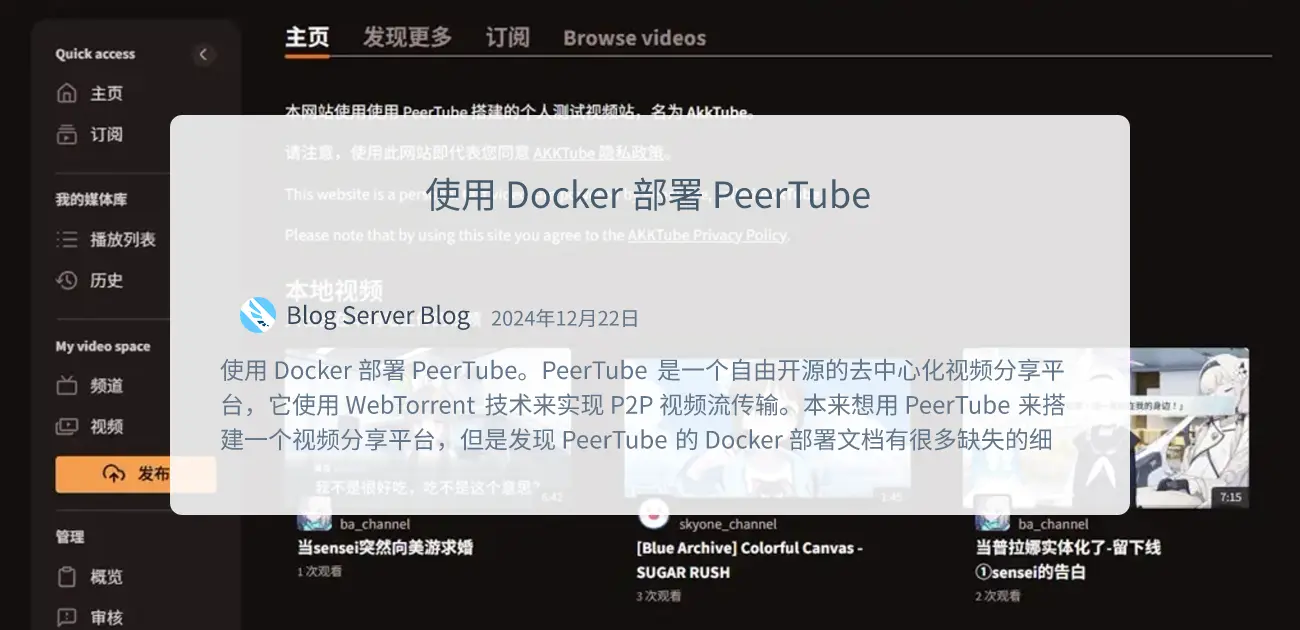
PeerTube 是一个自由开源的去中心化视频分享平台,它使用 WebTorrent 技术来实现 P2P 视频流传输。本来想用 PeerTube 来搭建一个视频分享平台,但是发现 PeerTube 的 Docker 部署文档有很多缺失的细节,所以写了这篇文章来记录一下 PeerTube 的 Docker 部署过程。
我已经搭建好了一个示例,大家可用访问 https://video.akk.moe 查看效果。
再贴一个 PeerTube 的嵌入式标签:
Docker Compose
我的 Docker Compose 文件是根据官方的 docker-compose.yml 修改而来的,官方的配置非常不实用 包含了很多不必要的配置,比如官方自定义了一个 nginx 容器,实在没必要;而且还用到了 PostFix 邮箱服务,一般人都不会用到。
下面是我的 Docker Compose 文件:
services:
  nginx:
    container_name: peertube-nginx
    image: nginx:alpine
    restart: "unless-stopped"
    networks:
      - proxy
      - peertube
    volumes:
      - "./nginx:/etc/nginx/conf.d"
      - "./logs:/var/log/nginx"
      - "./data:/var/www/peertube/storage"
      - "assets:/var/www/peertube/peertube-latest/client/dist:ro"
    labels:
      - "traefik.enable=true"
      - "traefik.docker.network=proxy"
      - "traefik.http.routers.peertube.rule=Host(`video.example.com`)"
      - "traefik.http.routers.peertube.entrypoints=web"
      - "traefik.http.services.peertube.loadbalancer.server.port=9000"

  peertube:
    container_name: peertube
    image: chocobozzz/peertube:production-bookworm
    restart: "unless-stopped"
    networks:
      - peertube
    env_file:
      - docker.env
    #ports:
    #  - "1935:1935" # Comment if you don't want to use the live feature
    volumes:
      - "assets:/app/client/dist"
      - "./data:/data"
      - "./config:/config"
    depends_on:
      - database
      - redis

  database:
    container_name: peertube-database
    image: postgres:13-alpine
    restart: "unless-stopped"
    networks:
      - peertube
    env_file:
      - docker.env
    volumes:
      - "./database:/var/lib/postgresql/data"

  redis:
    container_name: peertube-redis
    image: redis:6-alpine
    restart: "unless-stopped"
    networks:
      - peertube
    volumes:
      - "./redis:/data"

networks:
  proxy:
    external: true
  peertube:
    name: peertube

volumes:
  assets:
    name: peertube-assets
主要修改了:
- 使用 nginx 容器代理,不再使用官方的 chocobozzz/peertube-webserver 容器,这样可用方便自定义 nginx 配置。
- 去掉了 PostFix 邮箱服务,直接使用外部 SMTP 服务。
- 去掉了 certbot 容器,直接使用 Traefik 的 Let's Encrypt 功能。
- 使用了 Traefik 代理,具体请看使用 Traefik 作为 Docker 的反向代理,当然你也可以使用其他代理。
要使用的话,只需要将 video.example.com 替换成你的域名。
下面是对应的 docker.env 文件:
# Postgres configuration
POSTGRES_USER=peertube
POSTGRES_PASSWORD=
POSTGRES_DB=peertube

# PeerTube configuration
PEERTUBE_DB_NAME=${POSTGRES_DB}
PEERTUBE_DB_USERNAME=${POSTGRES_USER}
PEERTUBE_DB_PASSWORD=${POSTGRES_PASSWORD}
PEERTUBE_DB_HOSTNAME=peertube-database
PEERTUBE_REDIS_HOSTNAME=peertube-redis

PEERTUBE_WEBSERVER_HOSTNAME=
PEERTUBE_TRUST_PROXY=["127.0.0.1/8", "loopback", "10.0.0.0/8", "172.16.0.0/12", "192.168.0.0/16"]

PEERTUBE_SECRET=

# E-mail configuration
PEERTUBE_SMTP_USERNAME=
PEERTUBE_SMTP_PASSWORD=
PEERTUBE_SMTP_HOSTNAME=smtp.office365.com
PEERTUBE_SMTP_PORT=587
PEERTUBE_SMTP_FROM=
PEERTUBE_SMTP_TLS=false
PEERTUBE_SMTP_DISABLE_STARTTLS=false
PEERTUBE_ADMIN_EMAIL=

PEERTUBE_OBJECT_STORAGE_UPLOAD_ACL_PUBLIC="public-read"
PEERTUBE_OBJECT_STORAGE_UPLOAD_ACL_PRIVATE="private"
PEERTUBE_WEBSERVER_HTTPS=true
#PEERTUBE_LOG_LEVEL=info
要修改的项目有:
POSTGRES_PASSWORD:Postgres 数据库密码。PEERTUBE_SECRET:PeerTube 密钥,可以使用openssl rand -hex 32生成。- 一些 SMTP 邮箱配置。
PEERTUBE_TRUST_PROXY:可信任的代理 IP 地址,需要添加你的 docker daemon 的地址池,一般我给出的这个就够用了。PEERTUBE_WEBSERVER_HOSTNAME:PeerTube 的域名。PEERTUBE_ADMIN_EMAIL:管理员邮箱。PeerTube 会自动创建一个名为root的账户,使用此邮箱,一般不建议使用这个账户传视频,因此此邮箱可以随便填(只要邮箱的域名不会被有心人控制)。
这里默认你将 docker.env 和 docker-compose.yml 放在了 /app/path 目录下。
Nginx 配置
Nginx 的配置同样是从官方的 chocobozzz/peertube-webserver 中抄来的,做了如下修改:
- 去掉了 certbot 相关的 SSL 证书配置。
- 监听
9000端口,由于专门用来代理 PeerTube,所以不需要填 server_name。
upstream backend {
    server peertube:9000;
}

server {
    listen 9000;

    access_log /var/log/nginx/peertube.access.log; # reduce I/0 with buffer=10m flush=5m
    error_log  /var/log/nginx/peertube.error.log;

    ##
    # Application
    ##

    location @api {
        proxy_set_header X-Forwarded-For   $proxy_add_x_forwarded_for;
        proxy_set_header Host              $host;
        proxy_set_header X-Real-IP         $remote_addr;

        client_max_body_size  100k; # default is 1M

        proxy_connect_timeout 10m;
        proxy_send_timeout    10m;
        proxy_read_timeout    10m;
        send_timeout          10m;

        proxy_pass http://backend;
    }

    location / {
        try_files /dev/null @api;
    }

    location ~ ^/api/v1/videos/(upload-resumable|([^/]+/source/replace-resumable))$ {
        client_max_body_size    0;
        proxy_request_buffering off;

        try_files /dev/null @api;
    }

    location ~ ^/api/v1/users/[^/]+/imports/import-resumable$ {
        client_max_body_size    0;
        proxy_request_buffering off;

        try_files /dev/null @api;
    }

    location ~ ^/api/v1/videos/(upload|([^/]+/studio/edit))$ {
        limit_except POST HEAD { deny all; }

        # This is the maximum upload size, which roughly matches the maximum size of a video file.
        # Note that temporary space is needed equal to the total size of all concurrent uploads.
        # This data gets stored in /var/lib/nginx by default, so you may want to put this directory
        # on a dedicated filesystem.
        client_max_body_size                      12G; # default is 1M
        add_header            X-File-Maximum-Size 8G always; # inform backend of the set value in bytes before mime-encoding (x * 1.4 >= client_max_body_size)

        try_files /dev/null @api;
    }

    location ~ ^/api/v1/runners/jobs/[^/]+/(update|success)$ {
        client_max_body_size                      12G; # default is 1M
        add_header            X-File-Maximum-Size 8G always; # inform backend of the set value in bytes before mime-encoding (x * 1.4 >= client_max_body_size)

        try_files /dev/null @api;
    }

    location ~ ^/api/v1/(videos|video-playlists|video-channels|users/me) {
        client_max_body_size                      6M; # default is 1M
        add_header            X-File-Maximum-Size 4M always; # inform backend of the set value in bytes before mime-encoding (x * 1.4 >= client_max_body_size)

        try_files /dev/null @api;
    }

    ##
    # Websocket
    ##

    location @api_websocket {
        proxy_http_version 1.1;
        proxy_set_header   X-Forwarded-For   $proxy_add_x_forwarded_for;
        proxy_set_header   Host              $host;
        proxy_set_header   X-Real-IP         $remote_addr;
        proxy_set_header   Upgrade           $http_upgrade;
        proxy_set_header   Connection        "upgrade";

        proxy_pass http://backend;
    }

    location /socket.io {
        try_files /dev/null @api_websocket;
    }

    location /tracker/socket {
        # Peers send a message to the tracker every 15 minutes
        # Don't close the websocket before then
        proxy_read_timeout 15m; # default is 60s

        try_files /dev/null @api_websocket;
    }

    # Plugin websocket routes
    location ~ ^/plugins/[^/]+(/[^/]+)?/ws/ {
        try_files /dev/null @api_websocket;
    }

    ##
    # Performance optimizations
    # For extra performance please refer to https://github.com/denji/nginx-tuning
    ##

    root /var/www/peertube/storage;

    # Enable compression for JS/CSS/HTML, for improved client load times.
    # It might be nice to compress JSON/XML as returned by the API, but
    # leaving that out to protect against potential BREACH attack.
    gzip              on;
    gzip_vary         on;
    gzip_types        # text/html is always compressed by HttpGzipModule
                      text/css
                      application/javascript
                      font/truetype
                      font/opentype
                      application/vnd.ms-fontobject
                      image/svg+xml;
    gzip_min_length   1000; # default is 20 bytes
    gzip_buffers      16 8k;
    gzip_comp_level   2; # default is 1

    client_body_timeout       30s; # default is 60
    client_header_timeout     10s; # default is 60
    send_timeout              10s; # default is 60
    keepalive_timeout         10s; # default is 75
    resolver_timeout          10s; # default is 30
    reset_timedout_connection on;
    proxy_ignore_client_abort on;

    tcp_nopush                on; # send headers in one piece
    tcp_nodelay               on; # don't buffer data sent, good for small data bursts in real time

    # If you have a small /var/lib partition, it could be interesting to store temp nginx uploads in a different place
    # See https://nginx.org/en/docs/http/ngx_http_core_module.html#client_body_temp_path
    #client_body_temp_path /var/www/peertube/storage/nginx/;

    # Bypass PeerTube for performance reasons. Optional.
    # Should be consistent with client-overrides assets list in client.ts server controller
    location ~ ^/client/(assets/images/(icons/icon-36x36\.png|icons/icon-48x48\.png|icons/icon-72x72\.png|icons/icon-96x96\.png|icons/icon-144x144\.png|icons/icon-192x192\.png|icons/icon-512x512\.png|logo\.svg|favicon\.png|default-playlist\.jpg|default-avatar-account\.png|default-avatar-account-48x48\.png|default-avatar-video-channel\.png|default-avatar-video-channel-48x48\.png))$ {
        add_header Cache-Control "public, max-age=31536000, immutable"; # Cache 1 year

        root /var/www/peertube;

        try_files /storage/client-overrides/$1 /peertube-latest/client/dist/$1 @api;
    }

    # Bypass PeerTube for performance reasons. Optional.
    location ~ ^/client/(.*\.(js|css|png|svg|woff2|otf|ttf|woff|eot))$ {
        add_header Cache-Control "public, max-age=31536000, immutable"; # Cache 1 year

        alias /var/www/peertube/peertube-latest/client/dist/$1;
    }

    location ~ ^(/static/(webseed|web-videos|streaming-playlists/hls)/private/)|^/download {
        # We can't rate limit a try_files directive, so we need to duplicate @api

        proxy_set_header X-Forwarded-For   $proxy_add_x_forwarded_for;
        proxy_set_header Host              $host;
        proxy_set_header X-Real-IP         $remote_addr;

        proxy_limit_rate 5M;

        proxy_pass http://backend;
    }

    # Bypass PeerTube for performance reasons. Optional.
    location ~ ^/static/(webseed|web-videos|redundancy|streaming-playlists)/ {
        limit_rate_after            5M;

        set $peertube_limit_rate  5M;

        # Use this line with nginx >= 1.17.0
        limit_rate $peertube_limit_rate;
        # Or this line with nginx < 1.17.0
        # set $limit_rate $peertube_limit_rate;

        if ($request_method = 'OPTIONS') {
          add_header Access-Control-Allow-Origin  '*';
          add_header Access-Control-Allow-Methods 'GET, OPTIONS';
          add_header Access-Control-Allow-Headers 'Range,DNT,X-CustomHeader,Keep-Alive,User-Agent,X-Requested-With,If-Modified-Since,Cache-Control,Content-Type';
          add_header Access-Control-Max-Age       1728000; # Preflight request can be cached 20 days
          add_header Content-Type                 'text/plain charset=UTF-8';
          add_header Content-Length               0;
          return 204;
        }

        if ($request_method = 'GET') {
          add_header Access-Control-Allow-Origin  '*';
          add_header Access-Control-Allow-Methods 'GET, OPTIONS';
          add_header Access-Control-Allow-Headers 'Range,DNT,X-CustomHeader,Keep-Alive,User-Agent,X-Requested-With,If-Modified-Since,Cache-Control,Content-Type';
        }

        # Enabling the sendfile directive eliminates the step of copying the data into the buffer
        # and enables direct copying data from one file descriptor to another.
        sendfile on;
        sendfile_max_chunk 1M; # prevent one fast connection from entirely occupying the worker process. should be > 800k.
        aio threads;

        # web-videos is the name of the directory mapped to the `storage.web_videos` key in your PeerTube configuration
        rewrite ^/static/webseed/(.*)$ /web-videos/$1 break;
        rewrite ^/static/(.*)$         /$1        break;

        try_files $uri @api;
    }
}
一个字都不用改,所以直接复制粘贴即可,放到 /app/path/nginx/peertube.conf。
登录 PeerTube 网页
上面的配置弄完直接 docker-compose up -d ,这里不多说,下面讲讲怎么使用。
访问你的 PeerTube 网页,PeerTube 在首次启动时会自动创建一个名为 root 的账户,密码通过 docker logs peertube | head -n 50 可用找到,该账户的邮箱是你在 docker.env 中填的 PEERTUBE_ADMIN_EMAIL。
先用这个账户登录,在设置中修改密码,然后创建一个新账户,这个账户就是你的主账户,可以上传视频,记得将这个账户设置为管理员。
然后就可以退出 root 账户,登上新创建的账户,上传头像、设置 banner ...... 等的装饰性操作。
再创建一个频道,PeerTube 的视频是以频道为容器的,所以你需要先创建一个频道,然后再上传视频。
主页面可用使用 markdown 编写,下面是我写的一个例子,只需要将网站名字替换一下即可:
本网站使用使用 PeerTube 搭建的个人测试视频站,名为 **XXXTube**。

请注意,使用此网站即代表您同意 [XXXTube 隐私政策](/about/peertube)。

This website is a personal test video site powered by PeerTube, called **AkkTube**.

Please note that by using this site you agree to the [XXXTube Privacy Policy](/about/peertube).

<peertube-container data-layout="col" data-title="本地视频" data-description="只包含在本网站上传的视频">
  <peertube-videos-list data-count="10" data-only-local="true" data-max-rows="4"></peertube-videos-list>
</peertube-container>

看起来不错~
【完】